Alert Conditions
Alert Conditions allow you to define a custom alert based on the cell's value. Alert Conditions are defined per column, and the Alert notifications they create are displayed in the Alert Window. To enable/disable Alert Conditions press down on your right mouse button inside the Market Analyzer window select the menu "".
Creating an Alert Condition
To create an Alert Condition:
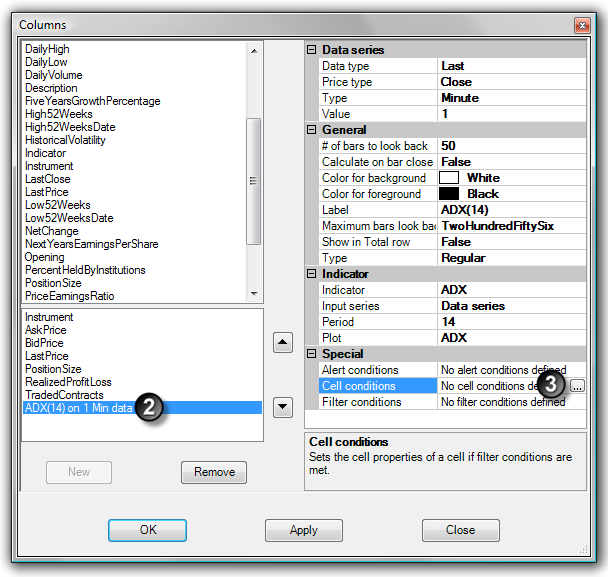
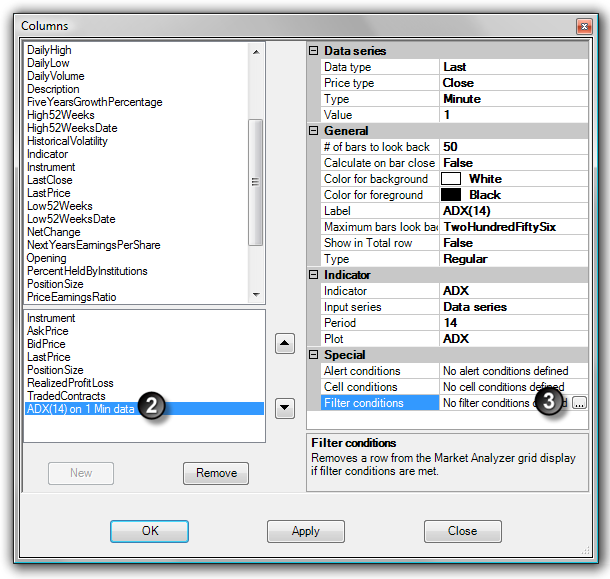
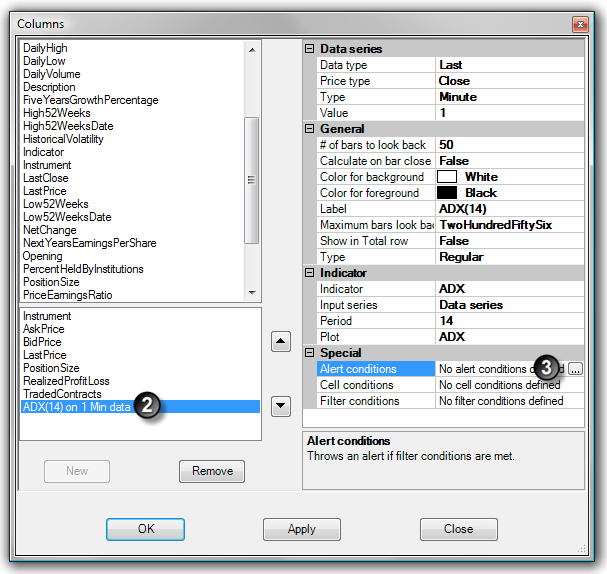
| 1. | Open the Columns window |
| 2. | Select the column you would like to create an Alert Condition for in the applied column section. |
| 3. | Under the Special parameters section select Alert conditions and then press the "..." button |
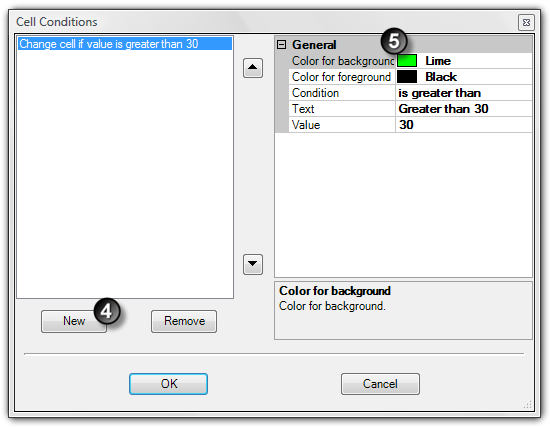
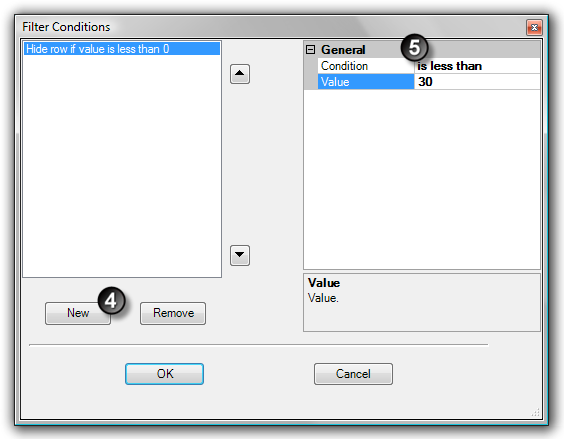
| 4. | Press the New button to add a new Alert Condition to the list of Alert Conditions displayed in the left side of the Alert Conditions window |
| 5. | Set the Alert Condition properties in the right side of the Alert Conditions window |
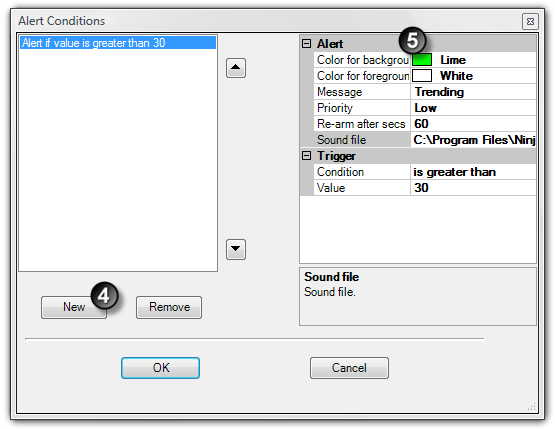
The example Alert Condition in the above image will:
| • | Trigger the alert once the cell value is greater than 30 |
| • | Display a lime green background with white text |
| • | Display "Trending" as the alert text |
| • | Re-arm the alert after 60 seconds has passed |
| • | Display a "Low" priority |
You can remove an Alert Condition by pressing the Remove button.
Please note setting the "Re-arm after secs" property to a value of zero means the alert will not re-arm once triggered.
Multiple Alert Conditions vs. Multiple Alerts
It is important not to confuse multiple Alert Conditions with multiple alerts. You can have one alert per Market Analyzer column and each alert can have multiple conditions. Conditions are evaluated from top to bottom.
Assume you have an alert with the following conditions defined:
Alert if value is greater than 30
Alert if value is greater than 100
In this example, if the value of the cell was greater than 100, the first condition of "greater than 30" would trigger the alert since its first in the list of conditions to be evaluated. The "greater than 100" condition would never trigger in this example since "greater than 30" will always trigger the alert first. To ensure that both conditions trigger an alert so that you get the desired alerting behavior you want, you have to list the conditions in this order:
Alert if value is greater than 100
Alert if value is greater than 30
This will guarantee that a cell value over 100 will fall in the "greater than 100" condition and cell values between 30 and 100 will be triggered by the "greater than 30" condition.
|